Thursday, December 29, 2011

How To: Shoe Stretching

I did a little retail therapy today for some New Years goodies and scored two pair of fabulous pumps by Bebe and Jessica Simpson for RIDICULOUSLY AWESOME PRICES. Normally I shy away from both of these brands because the instep is typically a high arch and they...well...hurt. But these two pair are actually quite comfy!

...or so I remember them being 'comfy' at the store. Seriously??

For me...my left foot is slightly bigger than my right foot..fun! And as I get older it seems like it's getting even worse which makes shoe 'collecting' much harder. So I discovered a way to do a little shoe stretching using good ol water and some ziplock bags!

PRODUCTS USED:
Two slightly snug pairs of pumps
8 quart sized Ziplock bags (they can be the regular, slider kind, or a generic kind but cheaper may equal leakage...yikes!!!)
Bobby Pins (short or long) optional
Tap Water
Freezer

STEPS:
One: Take one Ziplock bag and fill it to about 1/3-1/4 full. Ensure all the air is out of the bag and seal firmly.

Two: Place the sealed Ziplock bag filled with water into another empty Ziplock bag. Ensure all the air is out of the second bag and seal firmly again. This second bag is to protect your shoes in case of leakage. It should look like this:

Bag 1 w/ water sealed inside Bag 2

Three: Place the bags into one snug shoe. Make sure you push the bags deep into the toe area. If the bag begins to flop over the shoe, then try to empty a bit of water (not too much).

This=No Bueno!!

If emptying a bit of water does not work, check if more air needs to be released. If not, replace the bag into the toe area and secure the bag with a bobby pin like this:

Close Up

A lil something like this...

You may need to use the bobby pin if your heels have a really steep arch because the bags can't fight gravity, you know! Also, if if you only want to stretch the toe area then don't worry about the bobby pin thing if it is not flopping outward.

Four: Repeat for the other shoe (if needed). In my case I wanted to stretch my left shoe more than my right, so I filled my left bags with slightly more water.

Five: Place stuffed shoes into your freezer on a flat surface for 2-8 hours. This is dependent on your freezer quality and temperature you keep it at. The longer you leave it, the more stretch you can receive (but ice only expands for so long!) Just make sure the water is completely frozen before you remove.

Yep. Right on top of my Eggplant Parmesan :-)

Six: Remove after allotted time and allow the water bags to thaw completely.

..and voila! You can stretch your shoes anywhere from a half size to a full size bigger!!! This works better with leather shoes versus synthetic, but it will still work! Just be mindful with your timing when working with higher quality shoes as the material is softer and will stretch much easier (you don't want to go too far and end up with too big shoes!!)

**You can repeat this process for more stretch as many times as you like!!**

So when you see those hot shoes but they don't have them in your size, don't fret! Try this method out. Besides..if it doesn't work you won't be damaging the shoe externally and maybe you could even return them..although I'm not promoting that...of course :-)

Good luck!
xoxo

Wednesday, December 28, 2011

Thursday, December 22, 2011

Thrifty Treasures: Great Lash "Lots of Lashes"


So I was on the hunt for new mascaras since it's about that time to chuck my current ones. I picked up my usuals, but then also decided to check out the new mascara out by Great Lash.

See..Great Lash was my very first mascara that I started using in middle school before I knew anything about makeup. I had a clear mascara and my Great Lash..bffs! Fast forward several years and Great Lash put out an 'updated version" Maybelline Great Lash BIG that was a complete FLOP! That 'Big' lash made me look like I had five lashes..it was terrible. So I was skeptical about this new line "Lots of Lashes" but what really pulled me in was the brush applicator. It has a rounded end and a pointed end. Let me tell you! This thang pulls ALLL your lashes. I am highly impressed!

Pros:
-Price point, $4.64 at Walmart. Hands down one of the cheapest drugstore mascaras you will find.
-Dope applicator: Gets into the tight inner corners and fans out the outer lashes nicely.
-Gives nice volume!
-Nice rich color. I got the Brownish Black one and it was perfect.
-No funky smell to it.
-Cute packaging (as always from Great Lash)

Cons:
-Fast dry formula: Be sure to apply two coats on one eye at a time. I made the mistake of doing one coat, each eye, and when I went back to apply second coat it was kind of hard.
-Doesn't do so much for length


Go get you some!!

Sunday, November 27, 2011

Blonde hair, Don't Care!!!


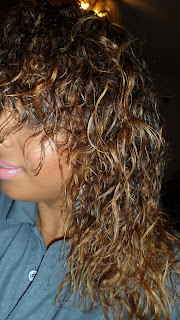
Soooo....I went blonde...err orange..or something lol. I knew I wanted to change it up sooooo this is what I did. I went from dark dark brown (with a light brown, red on bottom) to this!

PS. If your hair is damaged, then I would not recommend using bleaching products at this time. This process can be very damaging. I already knew before I colored my hair that I would be getting a drastic haircut afterward.

PPS. This was a huge change. I'm not sure how I feel about it just yet lol. If you have the money, go to a professional. I do not, so I did it myself.

Products Used:

Step One:
-I have curly hair, so I straightened it first for easier application
-Use the Revlon Frost & Glow Honey Highlighting Kit ($6.74 from Target). I have dark brown hair, so this was the kit for me. If your hair is lighter, they have other versions for lighter hair.
-I chose the full head application, but you can do face framing only, etc.
-The highlighting tool it comes with is a little crappy, so you may one to get your own.
-Shout out to my Dad for helping me use the highlighting cap and pull the strands through the back that I couldn't see! Lol
-I left it on for 45 minutes. This will vary depending on your hair. Keep checking it every 5 minutes or so. It will turn orange at first, but keep it on for it to go past that stage.

Step Two:
-Rinse, shampoo with Clairol Shimmer Lights for Blonde Hair ($8.29 at Sally Beauty/$7.49 for members), lightly condition, and rinse again
-Blow dry your hair. If you are satisfied with your color, then stop here! If your hair is still an orangy tint then follow the next step.

Step Three:
-Use the Revlon Colorsilk in Ultra Light Ash Blonde ($3.14 at Walmart and Target) all over your head. This will lift your base color to a light brown and the Ash color will cancel out the orangy blonde
-I left it on for 45 minutes per the directions
-While my hair was developing I prepared my deep conditioning hair mask which consist of half a ripe avocado, EVOO (1/2 cup), honey (1/4 cup), one egg (for protein..you can skip this) and I pureed it in a blender.

Step Four:
-Rinse, Shampoo with the Shimmer Lights again, lightly condition to detangle

Step Five:
-Freak out because your hair is blonde!
-Apply the deep conditioning treatment that you made above to your hair.
-Put a shower cap on and sit under a dryer or conditioning cap for 20 minutes.

Step Six:
-Rinse our your conditioning treatment and style your hair as normal

Maintenance:
-Since this was all damaging, you need to take special care of your hair. Regular hot oil or deep conditioning treatments are a must!!
-I will be using the Shimmer Lights shampoo regularly to tame some of the brassiness that I still have in my hair.
-I will also be getting a haircut to clean up any of the fried ends.

Good luck! Bleach at your own risk!!! I AM NOT a professional and have no clue what I am talking about lol

Friday, November 4, 2011

NOTD: Collide-o-Scope Xplosion


Nail of the Day: Collide-o-Scope xplosion!

On ring finger/big toe: Sally Hansen Salon Effects in Collide-o-scope
On fingers: Sinful Colors nail polish in Let's Meet
On toes: Sally Hansen Xtreme Wear in Blue Me Away!!

Ring: Forever 21

Have a great weekend!!

Wednesday, November 2, 2011

Tuesday, November 1, 2011

Check Me Out!


Follow me on Tumblr...
Why?
It's just easier!!!!


If you like a look, let me know and I can add a blog post about it...

Holler!


Sunday, August 14, 2011

LOTD: Summer Flowers (120 Palette)


Hi lovies!
Long time no post. Truthfully, I haven't been playing in makeup too much. This is a simple golden eye with pops of reddish pink and purple. Enjoy!

PRODUCTS USED:

FACE:
CoverGirl Clean liquid foundation in Tawny (applied with foundation brush only under eyes and on blemishes)
CoverGirl Clean oil control pressed powder in Tawny (applied with fluffy brush)

EYES:
CoverGirl eyeshadow in Brown Smolder (matte dark brown) for eyebrows
Two Faced Shadow Insurance as primer
NYX Jumbo Pencil in Milk as a base
120 Palette (soft brown gold on lid, shimmery reddish pink on outer lid and middle lower lash line, deep matte eggplant purple in outer v and lower outer lash line, matte brown similar to my skin tone on brow bone, eggshell color under eyebrow)
L'oreal Linear Intense liner in Black on upper lash line
ybl Your Best Eyeliner in True Black on lower lash line
Maybelline Falsies Mascara in Blackest Black

CHEEKS:
Everyday Minerals foundation in Deep Tan as a bronzer for contouring
25 piece Blush palette (muted pink and eggshell color mixed)

LIPS:
NYX Round Lipstick in Creamy Beige
NYX Lipgloss in Natural

Monday, June 27, 2011

Next Steps: Ear Stretch 10 gauge to 8 gauge


Hello lovies! My goodies came into the mail today from Minkymonky! Woo hoo! So I stretched to 8 gauge today and this may be my last one. I maaaaayyy go to 6 gauge but I am not sure. I like how this one looks and 6 gauge may be a bit too big for the placement of this second hole.

This stretch wasn't too difficult and I can say is definitely a noticeable gauge. The other ones were kinda small and didn't look all that obvious. My boo has zero gauge in his ears and they are adorable! A coworker of mine also has zeroes in his ears and he said that he felt 8 gauge was the first stretch he did where he noticed a difference. Granted, he went from 12 to 8! Bad boy!

I followed the same process as I outlined in my original post. I will say that this one was harder to get my tunnel in. The taper went in just fine, with the usual slight burning. I kept it in place for a minute or so and then tried to follow immediately after with the tunnel. That was a no go. I got the first third of the eyelet in and then it wouldn't budge. I had to slowly push it through (it was oiled up with jojoba oil too). I could feel it going in slowly. It did not hurt at all but I had to be sure I didn't put too much pressure because I did not want a blowout. Google it, eeeww!

This may be the last ear stretch post, guys! Oh well. I have a few hair products I've tried out so look forward to that..
8 gauge 316L surgical steel taper $3.74
8 gauge Clear CZ Prong Ear gauge/Plug $4.65 (left)
8 gauge 316L Steel Single Flare Ear Gauge/Flesh Tunnel $1.92 (right)
Isn't it cuuuute?!

Saturday, June 25, 2011

Dear Pluto..

Sorry guys..this one is not about beauty or a product. It's about a douchebag...lol. I do a bit of poetry but have never really shared it with anybody. Normally I feel the urge to write at very random moments and find myself scribbling my thoughts on some scrap paper or half used napkin. I felt the need to type this one out after my "ah ha" moment at work today. Pluto knows who he is..


So who wouldn’t fall for you?
When you’re a woman with a lonely soul and emptiness that only a
Warm embrace and handsome face…can cure.
Yes, I’m broken
Down and out, shaken and stirred
Feeling…
…..so hopeless
See, this isn’t the first time I’ve been
Lied to, taken advantage of, and had tons of game
Spit, spat, drip, drop
So wet as my thoughts go to feeling your
Manhood..
….All of you
Not just the dick, but..
All…of…you
Your mind, body, and soul…thoughts, fears, and goals..
All…of…you
Living the dream in my head
But the planets aren’t aligned
See, I’m on Jupiter and you’re on Pluto
And see apparently Pluto doesn’t exist anymore
What once was a planet with a sense of worth is
Not even on the radar…kinda like you
YOU.HAD.ME
I was on your team, your side, your tribe
But you booted Me…kinda like Pluto
But what you failed to realize is that big things come in small packages
See now you are alone with your
So called ‘friends’ and complicated ‘family’
Do they know you?
Does anybody know you?
Knock Knock..Who’s there?
NOBODY
An emptiness…a shell..a cocoon with no butterfly
So in a way, we aren’t so different
Me: Feeling alone because nobody ‘wants’ me but
You: All alone because you choose to be
“It’s too fast, too much, I can’t deal..”
“I DON’T HAVE TIME FOR THIS SHIT!”
See in my eyes, living on this earth is all about dealing with “this shit”
Being challenged, and pushed, and pulled in so many directions
Because I feel our LORD JESUS CHRIST suffered for us so,
Now it’s…our turn
My sins have been wiped clean and so
Now it’s...my turn
To live and love, to be kind, to be humble, to grow, to push through
The BULLSHIT
So, with that said Pluto
I still believe in you..
You may be off the radar, but you do exist
I can’t deny your reality, but I can keep you
Far, far, far away..

Monday, May 23, 2011

Next Steps: Ear Stretch 12 gauge to 10 gauge

10 gauge ear stretch

Hey lovies! I did my third stretch today. It was cake! I ordered from MinkyMonky again. This time I stuck with the steel taper since last time trying my acrylic taper was a disaster! Just like predicted, the steel taper was a breeze. This was my first steel taper from MinkyMonky and I notice they are much longer than BodyArtforms. This was also the first time I took a look at a taper and thought "Whoa! That is thick!" I was a bit worried that this stretch might hurt a bit more but nope. Good ol Jojoba oil made it just fine. I also heard of this stuff called Holey Butt'r which is like a cream mixed with different cocoa butters, oils, etc. that is good as well. Check it out!

I chose another simple piece of steel jewelry. I probably have about two more stretches to go before I am done.

For those wondering how my ear looks without jewelry, I included a pic. You really can't see a drastic difference between my other holes (the one in the middle is the one I am stretching)

12 gauge ear hole (middle) before stretch

10 gauge taper, $3.74
10 gauge 316L Surgical Steel Single Flare Ear Gauge/Flesh Tunnel, $1.92
10 gauge 316L Surgical Steel Flathead Ear Gauge/Plug, $1.92


Happy Stretching!

Saturday, April 30, 2011

Next Steps: Ear Stretch 14 gauge to 12 gauge

Hiiii!

So today my package came in with my materials for my next stretch. This time I decided to order from Minky Monky. On most websites, there are not a lot of cute ear plug options out there for anything smaller than 10 gauge. BodyArtforms has really cute 12 gauge plugs but I could not justify spending $15 on something I would only be wearing for a month until my next stretch so I searched around and found Minky Monky and got a simple Surgical Steel Single Flare Flesh tunnel (basically a hollow plug..you can actually see through the hole in my ear) and a CZ ear plug. Simple and cute and only a couple of bucks each.

12g Blue UV Glow in the dark Taper ($1.99)
12g 316L Surgical Steel Single Flare Flesh Tunnel (far left, $1.92)
12g Clear CZ Black Titanium Plated (over steel) Prong Set Plug ($5.40)

For this stretch I followed the same routine as I did in my stretch from 16 gauge to 14 gauge. I noticed there were two things different:

This time I didn't do my stretch after my shower so I just washed the area with Dial soap and did an ear massage for about 5 minutes (that's why my ear looks a little red in some photos). This may have made a difference.

Also, I chose to purchase an acrylic taper because it was cheap and I didn't think it would make a difference because once I use it for the stretch it doesn't stay in my ear at all. I know acrylic is not good for jewelery for a new stretch because the material is porous and can lead to infection but I thought it would be fine to use as a quick taper.

Boy was I wrong! This made ALL THE DIFFERENCE! First, it didn't slide as smooth as a steel taper. I thought it was just because it's a bigger jump of a stretch but no..it literally got stuck in my ear. When I first put it in, it was just fine..I felt the normal sting and it was good until about halfway there. This thing would NOT budge. I didn't want to force it so I was about to give up and go back to 14 gauge. I just let it sit in my ear for a bit and tried again and it still would not move. I took it out and wanted to see if my steel flesh tunnel would go in at all. I wanted to get a feel for how much I was able to stretch it at all with the acrylic taper. Wouldn't you know my steel flesh tunnel slid right in..no pain no nothing! Hmmmm? I can only chalk it up to this cheap ass taper. It may glow in the dark (who cares?) but it surely did not taper anything. Lesson learned!

Aint it cute? xoxo t.marie

Tuesday, April 19, 2011

Product Rave: Bodycology Body Cream and Moisturizing Hand Sanitizer

Hi all! So I spotted these products in the travel section at Walmart when I was looking for a new hand cream to leave in my purse. I stumbled upon gold! I loooveeeee these lotions sooo much!

They are so thick and moisturizing and smell awesome. They definitely kept my hands crack and ash free during winter. The slogan is "lasting moisture with a light fragrance" and it describes this product perfectly! They retail for about $1.97 for a 2 ounce tube. You can purchase the large sizes of these lotions in the spa section of Wamart, but I prefer the convenience of the small tubes and I also like to switch up my smells.

My favorite scent is Coconut Lime. It smells like the beach or tropical island and reminds me of margaritas. I've tried Cucumber Melon, Cherry Blossom, and Sweet Petals and haven't found a smelly one yet! I always get compliments from people after I put on the lotion because they smell so yummy!

This is the only hand cream that I continue to buy over and over again. Normally, I will buy a travel tube of regular lotion and lose it part way or get bored with it! This will definitely be a staple product and must have in my purse. The only problem is that a lot of times they are sold out or the choices are limited. So now I make a habit to pass by the travel section whenever I am in Walmart and just stock up on them because they go fast!

As for the hand sanitizer I was looking for a new sanitizer that had a fragrance. I am impressed at how these sanitizers actually moisturize your skin. It must be because it contains aloe vera, even though it is alcohol based. It's a very different feeling than your typical alcohol based sanitizer that dries out your skin.

Overall, I love love love this! Check it out!

Saturday, April 16, 2011

Dupe Alert: M by Mariah Eau de Parfum Spray

So I received the M by Mariah perfume set YEEAARRRSSSSS ago and have barely made a dent in the bottle. I do wear it often but perfume just seems to take forever to use up! I got the 3.3 fluid ounce bottle, the Shimmering Powder brush (silver shimmering powder w/ the same scent), and the 3.4 ounce Body Lotion as a Christmas present. My Dad bought it on the military base, so it was discounted but I do not remember the price. A quick scan online and it seems that the 3.3 ounce bottle alone retails for about $35 to $60 (didn't look at shipping costs).

About 6 months ago I was on the hunt for a few different body sprays (not perfumes) because I wanted something a bit more light. I headed to Bath and Body Works and picked up a few of the travel size sprays because I wanted something I could keep in my purse or my car or wherever. Toting around a glass container of perfume (let along a huge 3.3 ounce glass bottle with a giant glass butterfly as a cap) is just not happening! The travel sized sprays are in a plastic container and are great!

One of the Fragrance Mists (formerly knows as Body Splashes), Black Amethyst, smelled familiar but I couldn't put my finger on it. Fast forward several months and it finally dawned on me! Black Amethyst and M by Mariah smell the same! Ha ha! The difference? M by Mariah can cost up to $60. The 3 ounce travel sized Black Amethyst is FIVE BUCKS! Oh, and I also got it on the buy 3 for $10 deal so it was even cheaper! You decide!
xoxo t.marie


Monday, April 11, 2011

Next Steps: Ear Stretch 16 gauge to 14 gauge


Hi all!
As I showed you in one of my last entries, I'm stretching my second hole. Well, today I stretched to 14 gauge and it's so cute!

First things first..I waited about 3 weeks between putting 16 gauge in to stretching to 14 gauge. I got my products from Bodyartforms. I also sanitized my jewelry (the taper, plugs, and o-rings) by soaking it in boiling water and alcohol for about 15 minutes. While my jewelry was soaking, I removed my 16 gauge jewelry and soaped up my ear with the dial soap and rinsed thoroughly with water. I then took a shower and while in the shower I massaged my ear to allow more blood to flow to the ear and maximized circulation (supposedly, this makes the stretch easier). After my shower I rinsed the jewelry with clean water and washed my hands again. I then put a drop of the jojoba oil on my finger and spread it across the taper. I slowly pushed the taper through my ear and it went in smoothly until about the last third of the way. Then I felt a slight tingle (but no resistance!) and continued to slowly push through.

THIS SHOULD NOT HURT YOU! If it hurts, stop, and put your other jewelry back in and wait because your ear is not ready. You should only feel a slight tingle or burning sensation..NO RIPPING, TEARING, TUGGING!

I then let the taper sit for about a minute. I placed the end of my o-ring onto my plug (the star) and then pushed the steel plug through the front of my ear ear while simultaneously removing the taper out of the back end of my ear. I then placed my circle o-ring on the backside of my ear to hold the plug in place and voila! I am now stretched to 14 gauge! I do not feel any major soreness, but I do feel a slight tingle still in my ear. I will be sure to rotate the plug and do my Dial soap washes. So far so good!

When I get to larger gauges there is much cuter jewelry available but for now I will settle for a simple steel plug (which is probably healthiest for my ear anyway) and just jazz it up with different o-rings. I got them in black, red, glitter charcoal, cobalt, flowers, etc and they were super cheap!

STEEL Stretching kit ($7.00) which comes with a taper and two ear plugs.
Dial Antibacterial Soap ($2?) Jojoba Oil ($7 from Sally Beauty)
Right Ear: 14g steel ear plug ($7.00 kit) w/ black silicone star o-ring ($0.50) and top cartilage
Close Up: 14g steel ear plug with black silicone star o-ring
Left Ear: Two 2mm cubic zirconia earrings ($8 pair) and One 3mm Pink Opal Silver earring ($19 pair) in middle cartilage, both from Overstock.com

See...I'm definitely going to keep it girly!
xoxo t.marie


Friday, April 8, 2011

Your are doing WHAT to your ears?!

Hoollaaa!

Sooo, when I was fresh out of high school and in college I had a number of piercings that I adored. Fast forward to age 21 and I decided to take most of them out. Fast forward to having a baby and I decided that even more should come out. Fast forward three years and I'm bored and am looking for a change and creative outlook. I already have fun with my hair, nails, and makeup. So how about I play with my ears?! Lol..

Okay for reals. I am 'gauging' my second hole in my right ear. I have three lower lobe holes in each ear but I RARELY wear anything but earrings in my first hole that I've had since I was a baby. I decided to switch that up. I got a few 2mm (think baby earrings) cubic zirconia earrings that I plan to wear in my left ear holes and I only plan to wear two (inlcuding the stretched hole) in my right ear . Oh yeah, I also have my middle cartilage done on my left ear and the top cartilage done on my top right ear. Confusing? Eh! You will see pics along the way..

I did my research on ear tapering and don't plan on skipping any sizes as I stretch, especially because I rarely ever used my second hole. I'm using all stainless steel products which I purchased from Bodyartforms. I got my Dial soap ready for cleanings along with my salt soaks. If you have questions on ear stretching please do your research because I am NO PROFESSIONAL nor am I promoting a how to guide on how to do this!

I also do NOT plan on stretching very far..maybe an 8 gauge or a 6 gauge. I still want to have very feminine and girly ears. I also don't want to go too far because supposedly the point of 'no return' is about 0 gauge or 00 gauge.

So I am currently at a 16 gauge and have a small eyebrow ring in there now. I just ordered my 14 gauge stuff and plan on 'jazzing it up' with a star or flower o-ring (again..pics will be coming as I go through this!)

So..here is my first pic...ta daaaa! See my third hole. I don't plan on wearing anything in there but on my other ear I will.

ta ta for now! xoxo t.marie

NOTD: Spring Fling!


I was feeling very SPRINGY when I chose these colors. I wanted to do something fun and different. I absolutely adore spring florals, peaches, greens, blues, and pastels! I loooveee it! This look is best when you use polishes of the same family (ie, these are both cream polishes). Keep metallics with metallics, shimmers with shimmers, etc. although a pop of glitter on the ring finger may be cute

FYI: I did my toes in the powder blue color!

PS.I know they aren't perfectly polished but oh well!

PRODUCTS USED:
Nail Magic as a basecoat
Sinful Colors in Innocent ($1.99 from Walgreens)
Eva Supreme nail lacquer in Powder Blue (I think I got this for 99 cents at Walmart!)
Seche Vite Fast Dry Topcoat

LOTD: Purple Champagne


Hi guys!
I meant to post this a loonnnggg time ago but I've been lazy. I really love love love how this look came out. It came out a golden purple look that was awesome! Enjoy!

PRODUCTS USED:

FACE:
Neutrogena Oil Free Moisturizing Face Lotion
MAC Matte as a primer
MAC MSF Natural in Dark
ELF HD Finishing Powder

EYES:
Two Faced Shadow Insurance as Primer
NYX Jumbo Pencil in Purple as a Base (This is a blueish purple)
Loreal Hip Metallic Shadow Duo in Sculpted (light pinky color all over lid; dark purple in the outer v)
Ben Nye Lumiere Grande Color in Luxor (my fav Ben Nye shadow; a quick sweep all over lid to make the color pop and outer lower lash line)
NYX eyeshadow in Eggplant in crease
MAC loose pigment in Rose Gold on lower inner corner lash line
Sonia Kashuk Enhanced Eye Shadow in Burnished (metallic taupe on brow bone)
NYX eyeshadow in Champagne as highlight
Maybelline Line Stiletto eyeliner in Black
Maybelline Volum Express Mascara in Black

CHEEKS:
NYX Pressed Blush in Raisin (mauve)
NYC Bronzer in Terracotta Tan

LIPS:
NYX Jumbo Lip Pencil in Pecan
NYX Round Lipgloss in Real Nude

Monday, March 14, 2011

NOTD: Ode to Theta Nu Xi!

Hello!
These nails were inspired by my lovely sorority, Theta Nu Xi Multicultural Sorority, Inc. Check us out at www.thetanuxi.org or www.fsuthetawomen.com if you are in the Tallahassee area.

PRODUCTS USED:
Nail Magic as a Base Coat
Confetti brand nail polish in Belle of the Ball as a base color (lavender)
China Glaze crackle glaze in Crushed Candy (Think For Aubrey as a crackle)
Seche Vite dry fast top coat

(Photo taken without flash)

xoxo t.marie

Thursday, March 10, 2011

NOTD: Barbie on Crack!


Nail of the Day! Nail of the Day!

Hola,
So I got the China Glaze Crackle polish collection and have been playing around with them. They are nail polishes that you layer on top of a base color and they create a 'cracked' effect. I have all six colors so expect to see future nail of the day photos!

As for the polishes, so far, so good! They aren't extremely difficult to work with, but I am still toying around with color combinations and the application. This is my first time wearing it and this week I decided to go with a black and hot pink look.

Excuse the crappy pic and sorry about the chipping on the index finger. I should have taken it as soon as I finished my manicure but this pic was taken a few days in. Oh well!

PRODUCTS USED:
Nail Magic Nail Hardener as a Base (my secret weapon!)
Milani Nail Lacquer NEON in 507 Pink Hottie (two coats dried completely)
China Glaze Crackle glaze in Black Mesh
China Glaze Fast Forward Top Coat (I like this and am running out. I'm starting to have to scrape out the product which means the application isn't a smooth as I'd like. The polish would come out a lot better with a fresh bottle!)

Saturday, February 26, 2011

Back to Black...errr Blue!


Hi lovies!
I decided to switch up my hair color. I've been cutting my own hair for the past couple of months and felt liking spicing up the color routine from the typical dark dark brown. I've put color in my hair in the past and I normally keep it dark. I didn't want it to be boring or one dimensional so I decided on a lovely BLUE BLACK. It's pretty much black but there is a slight tint of blue, more so in the sun. It's work friendly but still fun. I did my research and this is what I ended up with:

All products were purchased at Sally Beauty. I have a Beauty Rewards card so I received a discounted price on all items. I also had a 15% reward coupon that I used. I used a 1:1 ratio for color to developer and left it on for about 25 min. I then rinsed until the water was clear and then conditioned. Left the conditioner on for about 5 minutes, rinsed and then blow dried.

Hair Color:
Ion Color Brilliance Intensive Shine Demi Permanent Creme Hair Color in Blue Black, 2.5 oz tube $3.99 (I used almost two tubes, about 4.5 oz)
Ion Sensitive Scalp Developer, Volume 10, 8 oz bottle on sale for $1.99. Normally the 4oz is the same price (4.5 oz of developer used as well)
Manic Panic After Midnight Blue, $8.49 (this is an extreme dye that typically works best on pre-lightened or bleached hair. Most people will get a bright navy blue color. I didn't lighten my hair at all and just wanted a subtle blueness on my bangs and tips)

Hair Supplies:
X-Large Clear Mixing Bowl by Sally Beauty, on sale for $1.99
Two Clear Tint Brushes by Salley, $.99 each

Hair Care Products:
Ion Color Solutions Color Defense Shampoo, $5.39 -- I haven't used this yet so I have no clue if it's an okay product or not!
Ion Color Solutions Deep Daily Conditioner for Color-Treated Hair, 100% Vegan - Paraben Free, $8.49 -- This stuff is very think and lux. but is still easy to comb through. I like it A LOT!

Okkkaaayyy...so this is what I started with:

(Pretty dark, but kind of Mary Jane boring!)

And this is how it ended!

(This is pre-flat iron. All I did was blow dry and then I took this pic)

FINAL THOUGHTS:
Overall, I really like this color and probably will re-use most of these products. Since it's a demi-permanent it will not last as long as a true permanent so touch ups will be needed to maintain it. I was really impressed that the Ion color had no smell and is ammonia free. It didn't dry my hair out at all, and left it very soft and with great shine. For a hair dye, I found it to be gentler than most. It's a creme so there was no dripping and the product was easily smoothed onto my hair with the tint brush.

The Manic Panic was disappointing because I thought that it was at least show up a tiny bit! I sectioned off my bangs and alternated the Manic Panic and Ion color for this area. Then after every section I put Manic Panic on the tips. I really wanted the blue to hit more in those areas but not have me looking like a giant smurf with blue all over my head. Well, it didn't show up at all! Once again, it's because this product is designed to be used on pre-lightened hair and my hair was pretty dark. In the future I may lighted a few layers on the bottom and throw this on to see how it looks, but I'm in no rush.

Happy Hair Coloring!